How to start mountaineering: 5 tips from a mountain guide
Want to get started? How to get started in mountaineering: discover the safest guide tips to avoid mistakes and succeed on your 1st climb.

Getting started in mountaineering means mastering three things in order: the basic techniques that prevent stupid mistakes, the right equipment without overpaying, and a method for making decisions in the field. With these solid foundations, you can succeed in your first race and, above all, finish it without unnecessary hassle.
The 5 tips below will give you a clear path to follow: learn the gestures that make you safe, build a coherent kit, choose the right training, apply a short safety routine, and avoid the 'easy' trap, which can be more dangerous than it seems.
Where to start? If you're not sure, start with tips 1 and 4. These are the ones that will make the biggest difference to the way you move and make decisions in the field, even on a tight budget.
Knots, crampons, ice axe: the basics that prevent 80% of mistakes
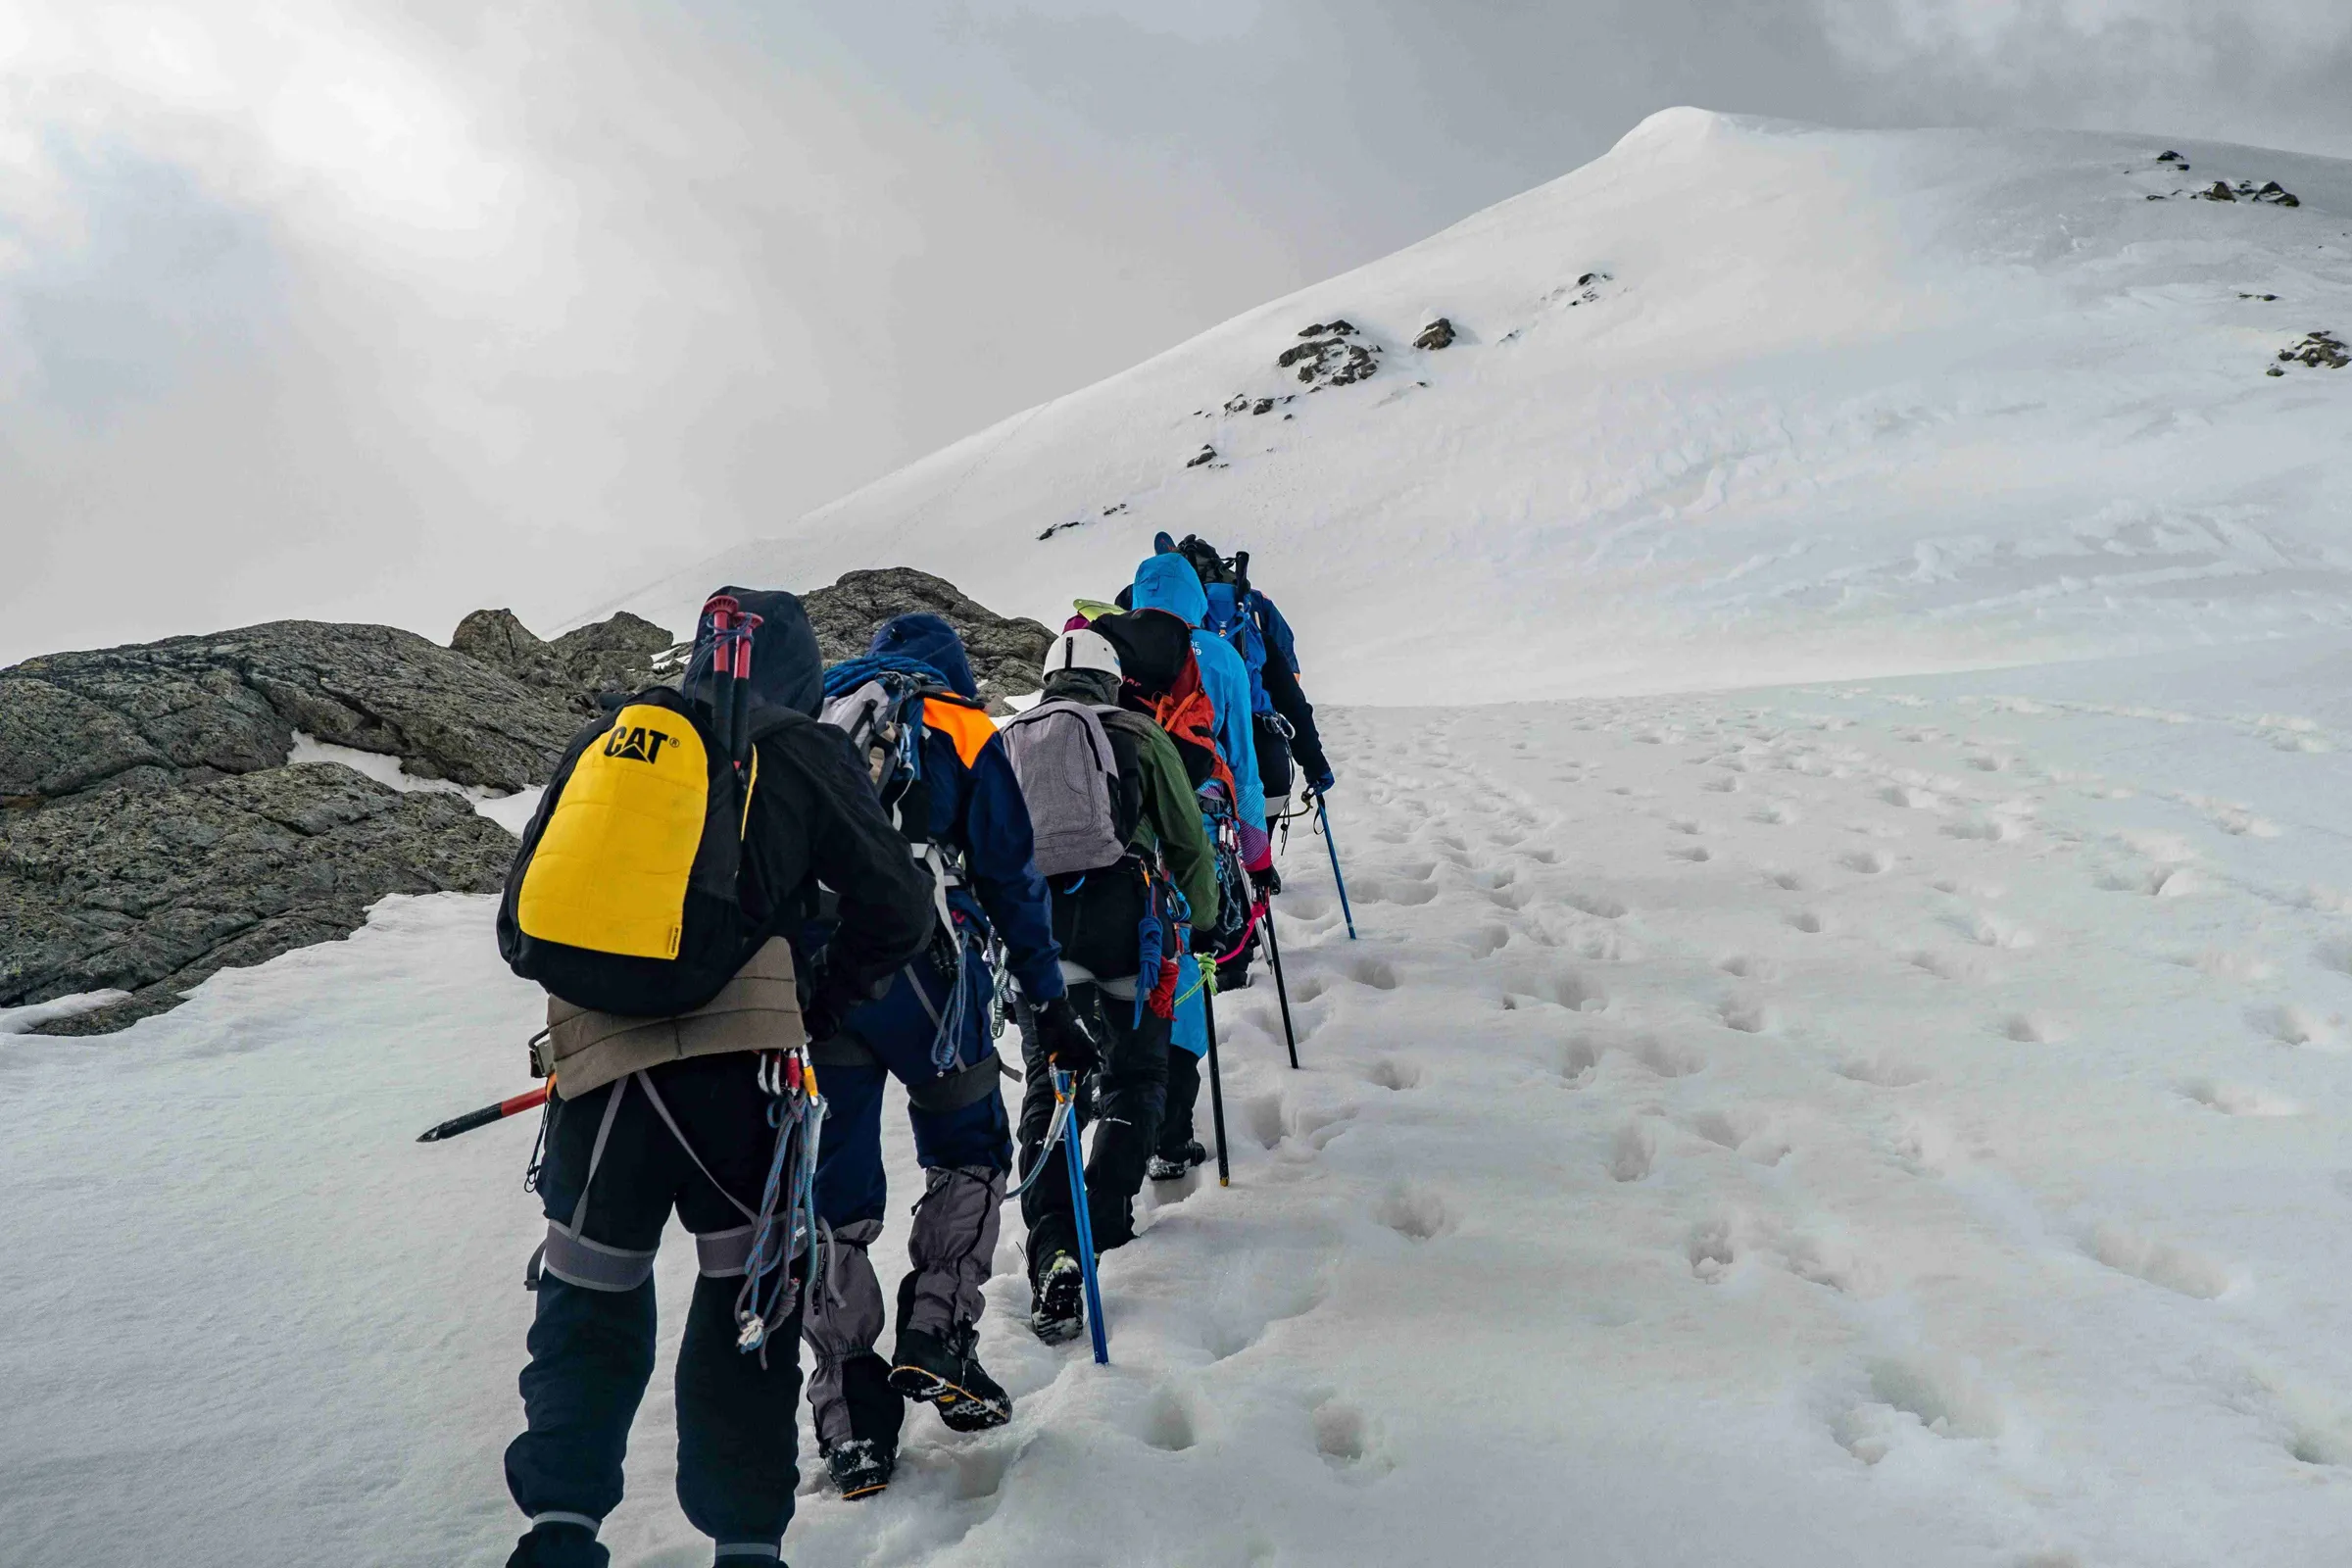
Control in the field starts with simple gestures. Three basics are enough to avoid the majority of problems when you're starting out in mountaineering: tying knots without thinking, walking in crampons without getting stuck, holding the ice axe in a useful way. These fundamentals will save you time, reduce avoidable mistakes and make each outing more understandable.
A mini-checklist of the basics you need to master before your first outing
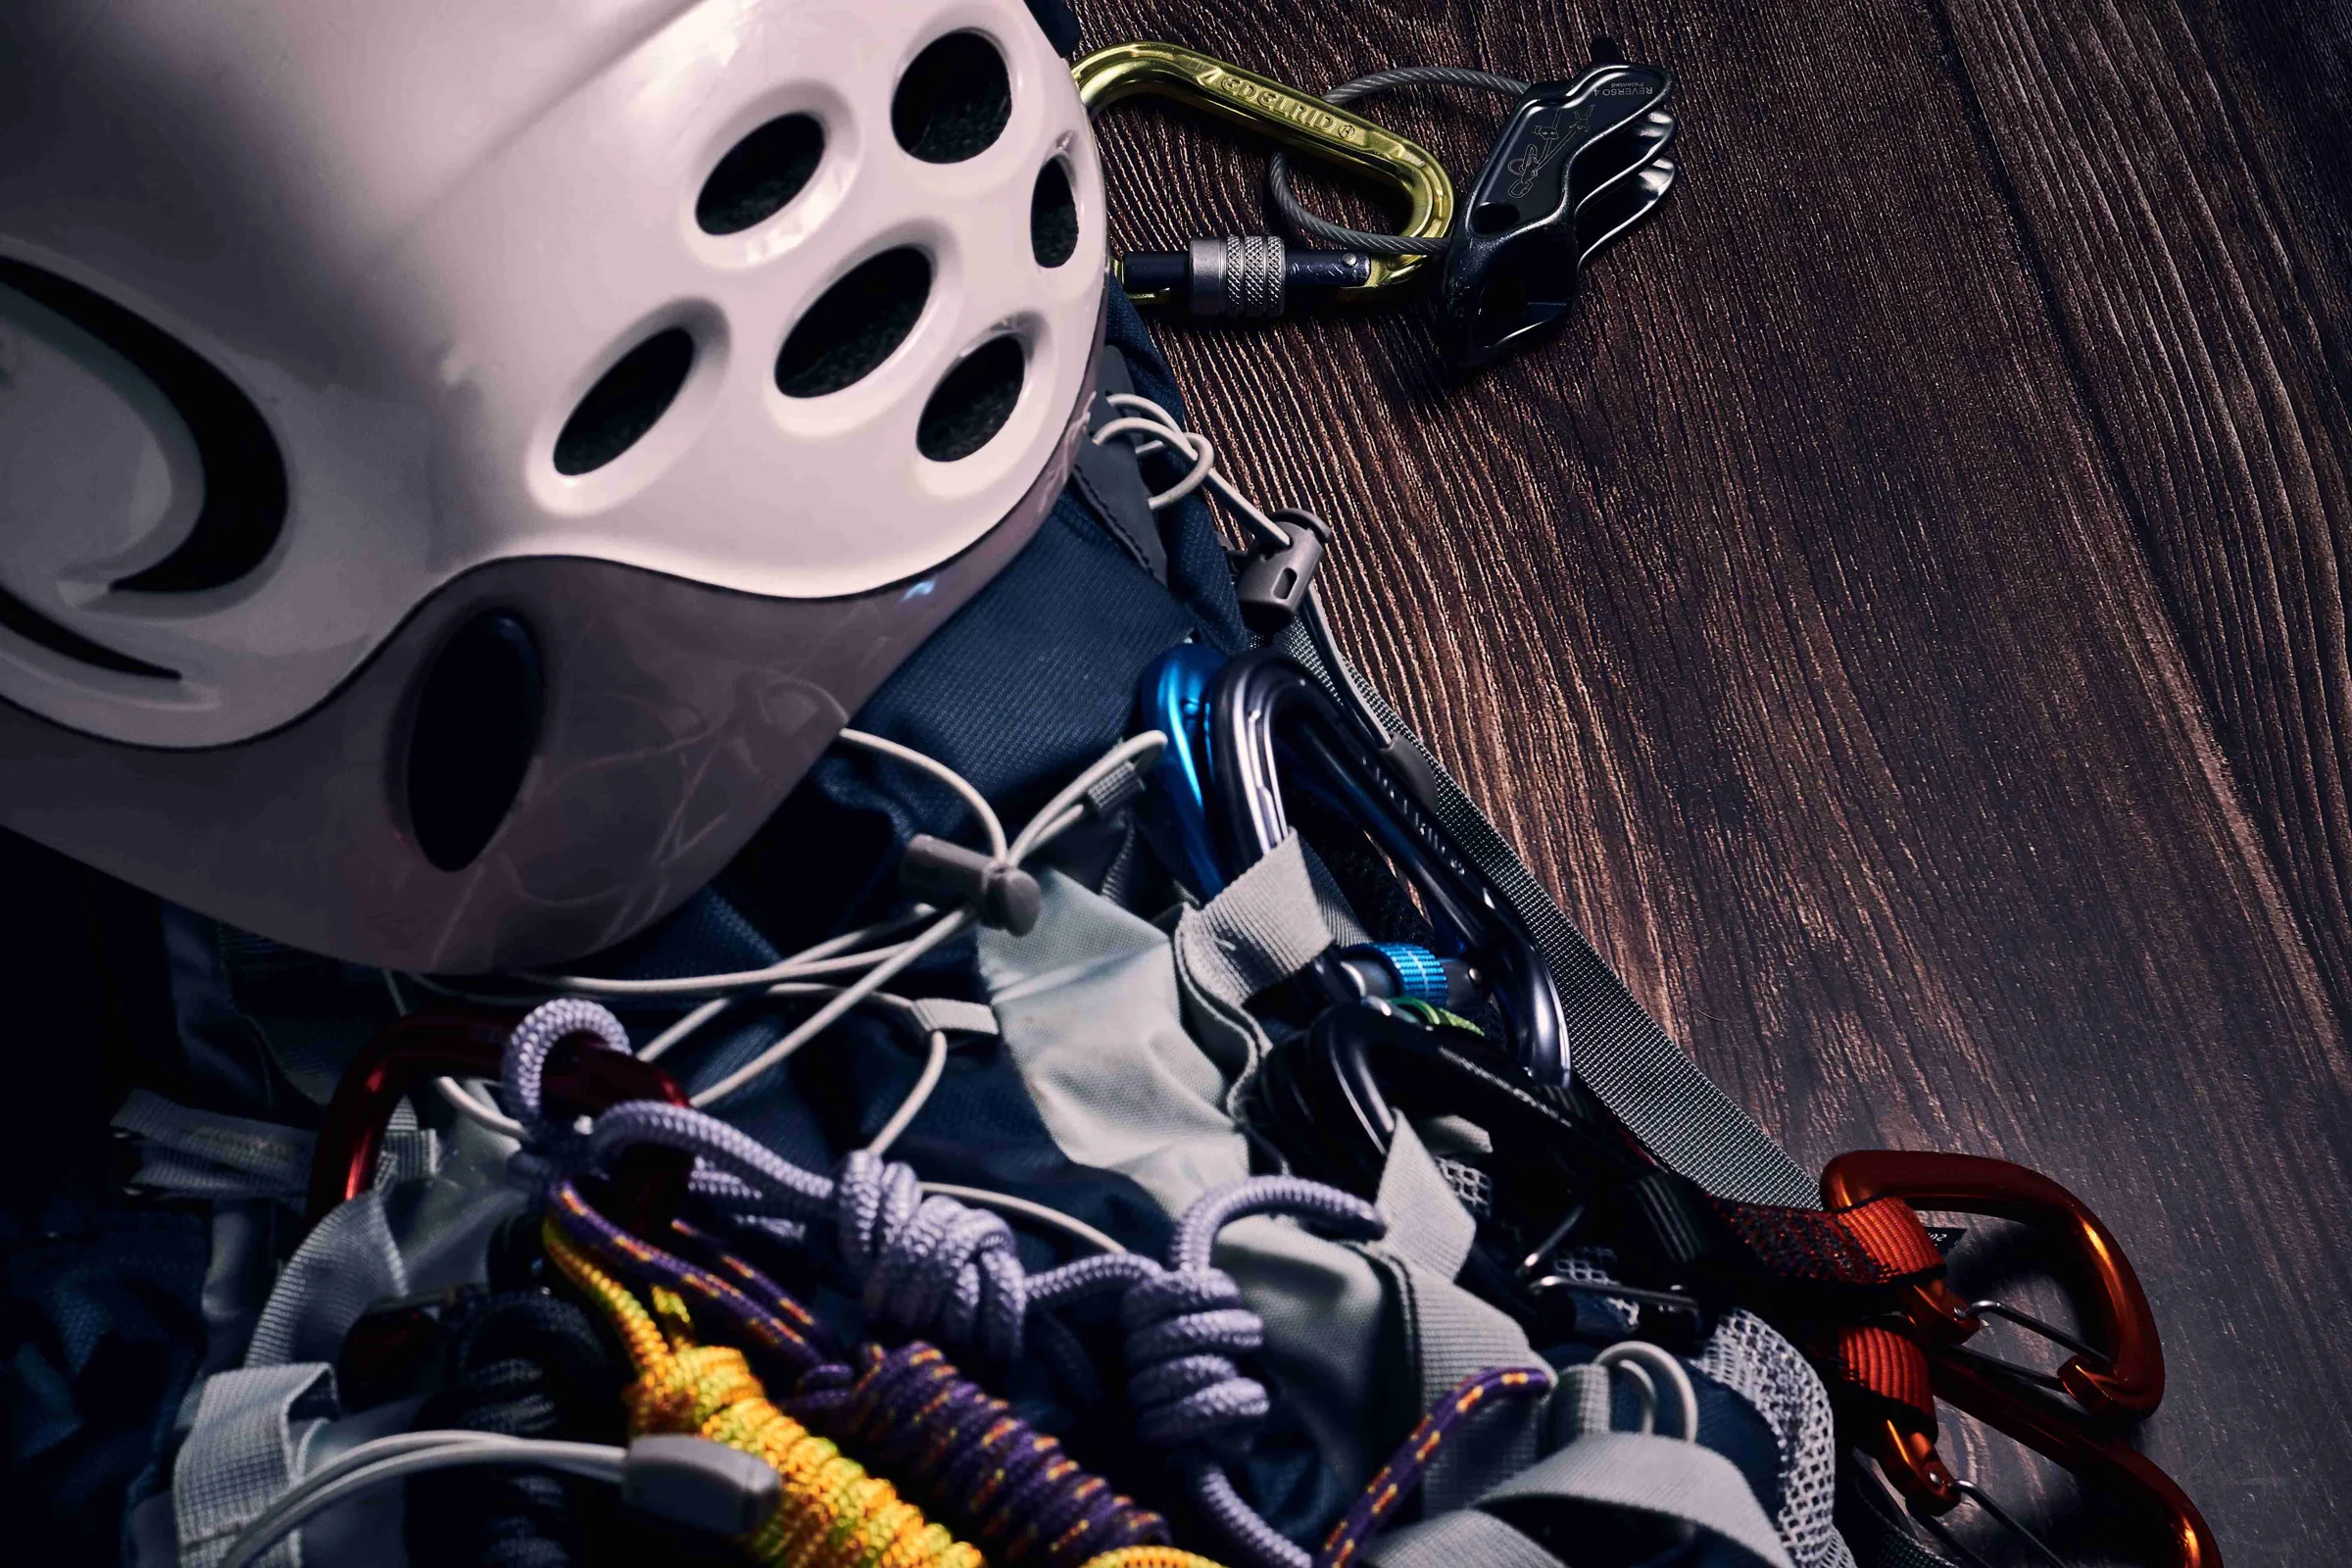
Knots: figure-of-eight knot (roping), capstan knot (belaying, adjusting), half-capstan knot (emergency belay), double fisherman's knot (rope ring)
Rope management: wrap neatly, avoid foot loops, check that nothing passes behind a leg or crampon
Crampons: adjust to the right size, tighten securely, walk with your feet apart to avoid snagging your trousers
Ice axe: grip when climbing, change hands, simple anchoring, stop on an easy slope (self-stop) on shallow snow
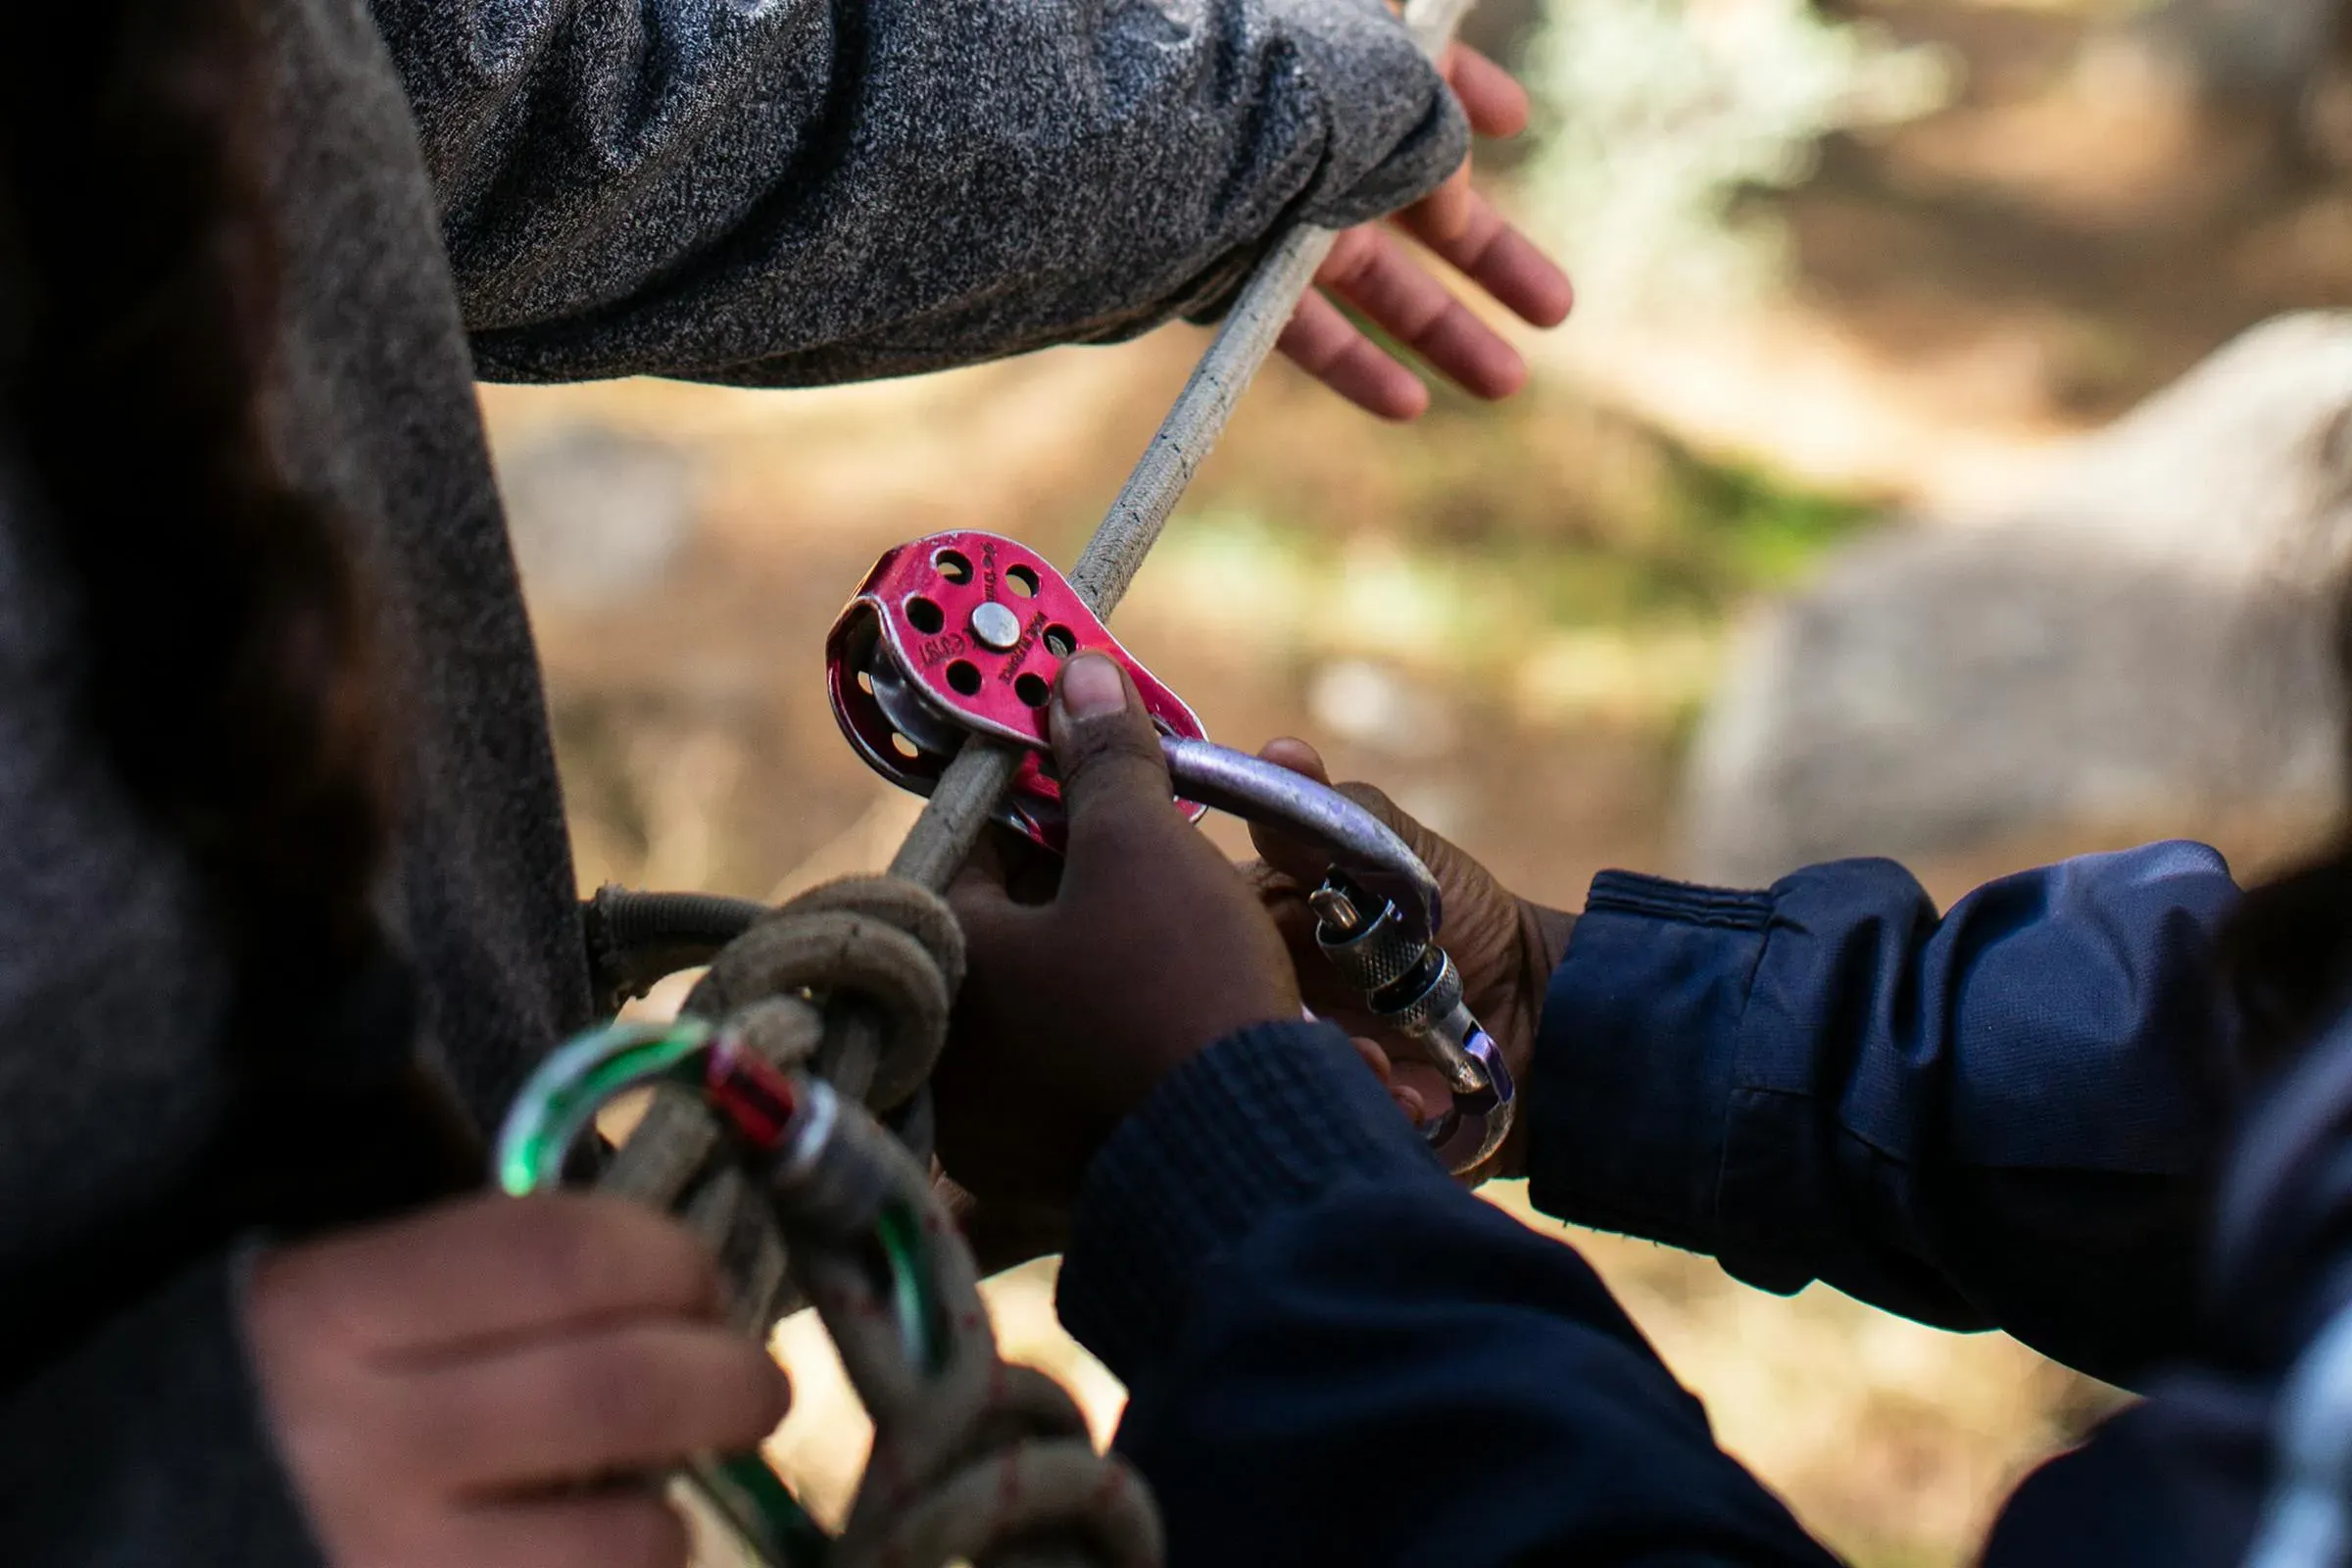
Rope routines: check your partner (harness, knot, carabiners locked, crampons attached) before moving off.
Beginner's mistakes always occur in the same places. You snag your trouser leg with a front spike because you're walking too much "on a line". You lose time because you repeat your figure eight three times. You put yourself off balance because you hold the ice axe like a walking stick, away from the slope. Correcting this early on will change your safety level faster than buying new equipment.
To learn effectively, look for immediate feedback. A club affiliated to a national federation (UIAA) or a guided outing with a UIAGM/IFMGAguide will correct in two minutes what you've been repeating incorrectly for months. Even a session on a snow slope with a competent person is worth a badly prepared "big" outing.
What equipment should you buy to get started without breaking the bank?
When you learn how to use gloves, you soon realise that the equipment you buy has to be simple, compatible and reliable. The best way to get started in mountaineering without breaking your budget is to hire what you need for the trip and buy what you need for comfort and hygiene.
Purchasing priorities (from most cost-effective to easiest to regret)
Mountaineering boots: the No. 1 purchase. Choose according to the crampons you're aiming for (semi-auto or auto) and insulation. Try them on with the socks you'll be wearing, and check there are no hard points. Shoes that are too soft make the crampons unstable.
Clothing and gloves: 3-layer system (breathable base, insulation, waterproof jacket). Take 2 pairs of thin gloves to handle the rope, warm for breaks.
Helmet: lightweight, ventilated, UIAA standard. Check the fit with a cap underneath.
Harness: adjustable at the thighs to fit over trousers, sufficient gear loops, simple buckles.
Bag: 30 to 40 litres, stable back, ice axe holder, crampon straps.
To rent at the beginning and why
Crampons: compatibility with the boot is the No. 1 pitfall. Hire first, buy when you know whether you're sticking with 10 or 12 points.
Ice axe: length depends on use (flat glacier ≠ steep slope). Rent while you find your preference.
Rope, pins, jammers: don't buy until you have a regular partner and a real need.
Two marketing traps come up all the time: buying "more technical for later" and piling on gadgets instead of reinforcing the basics. Simple rule: if you can't explain the exact use on your itinerary, rent or don't buy.
Millet is a good option for hiring your first kit: reliable, standard-compliant equipment, with no need to worry about compatibility.
Club, guide or course: what training do you need to progress quickly?
Training tells you whether you know how to use your equipment when it's slippery, when it's cold, and when you need to decide quickly. The best way to get started in mountaineering is to take a guided course that corrects your automatisms, especially when it comes to using ropes, belays and crampons.
The 3 formats that really save time
Mountaineering club (national federation): excellent progress/price ratio, regular outings, partners to practice with. You move at the pace of the group and the weather.
UIAGM/IFMGA guide: immediate feedback, tailor-made teaching, choice of route adapted to the day. The most effective option for learning quickly about safety, belaying, fitting protection and managing schedules.
Course (school or organisation): intensive format over 2 to 6 days, structured progression, repetition. Check the ratio of guiding to participants and the exact content.
Don't hesitate to check out the introductory mountaineering courses near you!
How to choose qualified guiding staff
With Wildhartt, you have a guide who accompanies you from A to Z in the field.
Ask for a practical programme: roping up on a glacier, stopping a fall, abseiling, objective risk management, etc.
Clarify the terrain: snow, rock, mixed, altitude, duration, pre-requisites, etc.
Requires a decision-making framework: turnaround time, cancellation criteria, plan B, etc.
Confirm the professional insurance of the guiding staff and your personal insurance.
To progress quickly, apply this loop: 1 guided day to learn properly → 2 to 4 easy outings to repeat using the same method. That's when mountaineering becomes readable.
How to manage safety on your first mountain trip
A method is useless if you don't apply it when the weather changes, the track disappears and you're tired. If you want to start mountaineering without improvising, adopt a short routine that is always the same before and during your first run.
Field method (before the race + on site)
Weather forecast (the day before and in the morning): read a mountain bulletin, not a consumer app. Look at the wind at altitude, the 0°C isotherm, the risk of thunderstorms and visibility. If you can't explain in one sentence what's going to get worse, choose a shorter objective.
Conditions: look for recent feedback on the route (Mountain hut, up-to-date topo). On the glacier, beware of "ça passe" without a date. Snow bridges change quickly after a thaw.
Legible route: reliable topo + off-line track + 2-3 simple identifiable landmarks (col, slope break, ridge).
Turn-around time: set a non-negotiable time before setting off. Write it down. Stick to it.
Communication: tell someone your plan (route, times). In the field, set decision points: "at the col we decide", "at the snow bridge we rope up".
When you get there, do a rope micro-routine: check each other (harness, knot, locked karabiners, crampons), then do a rhythm test. If you're out of breath after 10 minutes, you'll pay for your lucidity later.
Two classic mistakes made by beginners: leaving late "because you're on holiday", and following another roped party without understanding their choices. Crowds don't make things safer - they mask the warning signs.
To gauge avalanche risk, the EAWSwebsite clearly explains levels 1 to 5 and what they imply in the field.
The "easy" trap: why a low rating is not always safer
An 'easy' rating describes the average technical difficulty, not the exposure to rockfalls, the time of day the slope catches the sun, or the quality of the tracks. Remember this rule: a simple first run on paper can be more dangerous than a slightly more technical route that is colder, more stable and better protected.
The 3 pitfalls of popular 'easy' routes
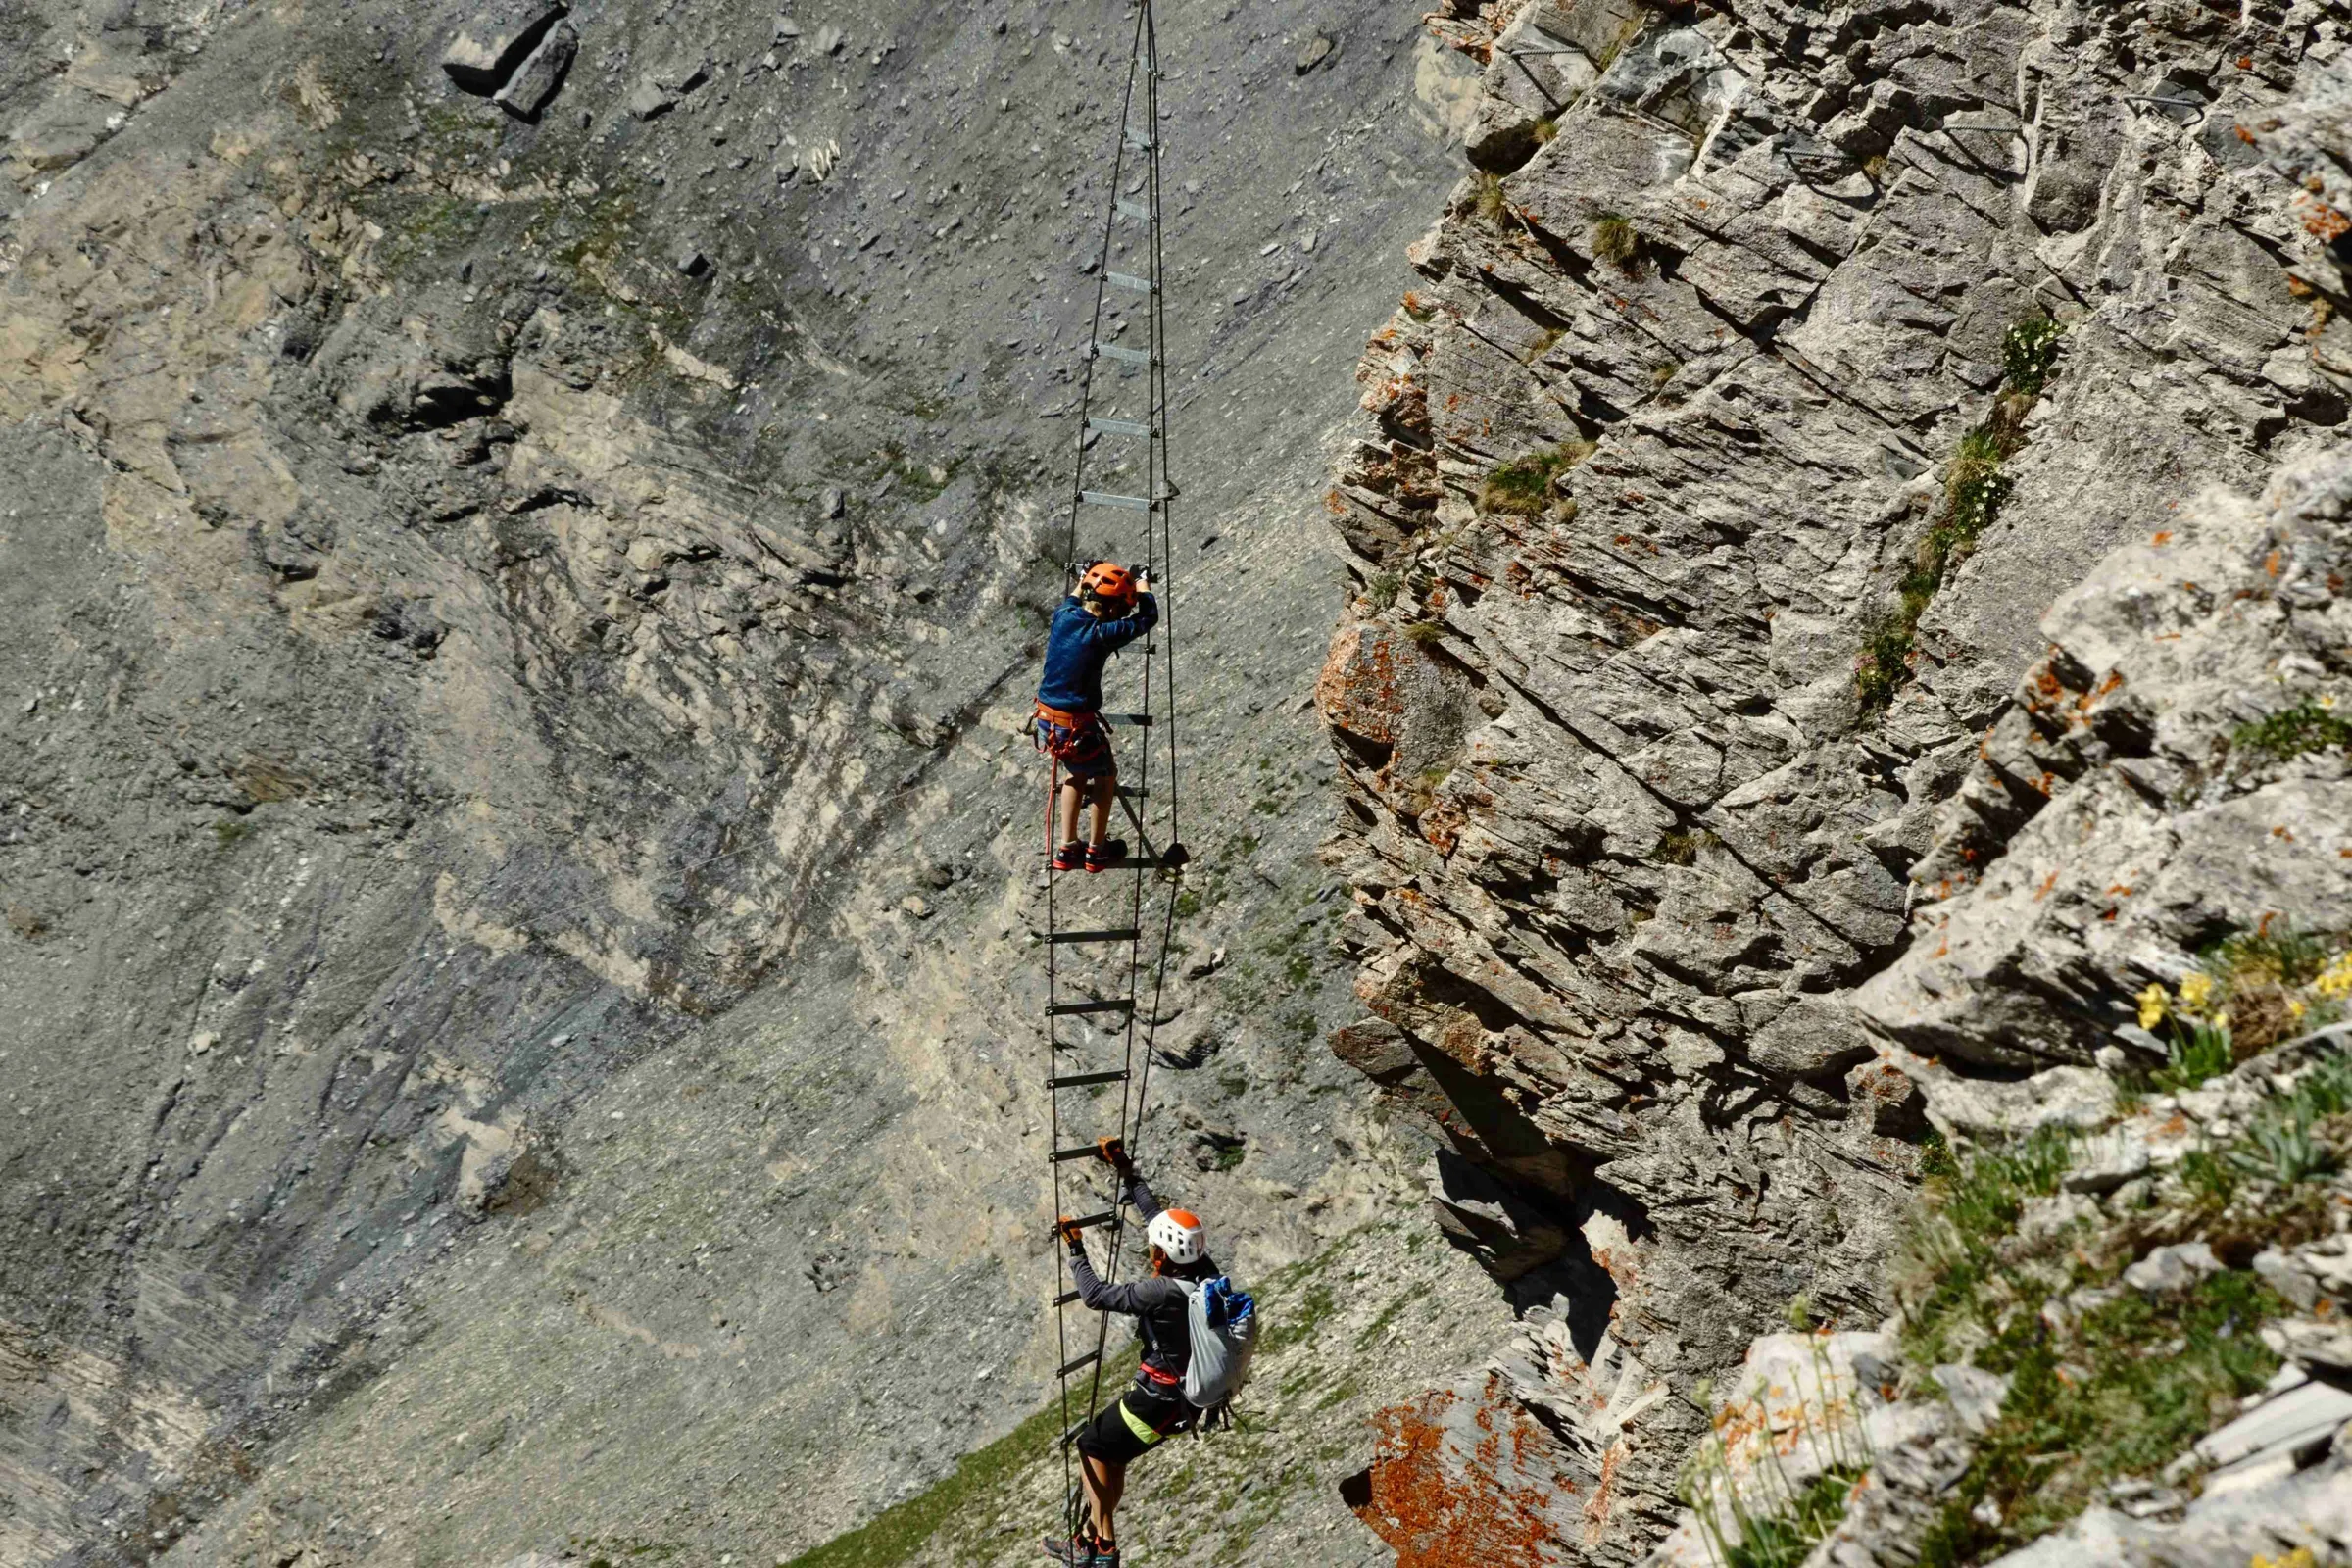
Rock falls: the access corridors concentrate projectiles, especially when the snow turns.
Crowds: the more roped up you are, the more you are affected by other people's mistakes. Crowds also push you to speed up and exceed your timetable.
Tight schedules: a late start puts you in the wrong window of snow, seracs or rocks.
How to choose a really suitable first ascent
Choose an objective with options: wide ridge, glacier with few crevasses, clear escape routes, etc.
Reduce exposure: avoid rocky couloirs, even if the grade goes up a notch
Lock in the timetable: set a turnaround time before setting off, and stick to it
Read the conditions, not the reputation: avalanche bulletin (EAWS) + mountain weather report
Take qualified advice when in doubt: a UIAGM/IFMGA guide will tell you if the "easy route" is a bad idea that day
Concrete action: take a route that you thought was "easy", and rewrite it in three lines: (1) your start time, (2) your turnaround time, (3) the two most exposed areas. If you can't name them clearly, you haven't yet chosen a suitable first race.
FAQ : Beginner mountaineering
Do I need to know how to climb to start mountaineering? No, you don't have to know how to climb to start. Most of the first routes are on snow and glacier, without any technical climbing. Being in good physical condition, mastering basic knots and using crampons are enough to get you started.
What budget should I set aside to start mountaineering? Allow between €300 and €600 for a starter kit (boots + clothing + helmet + harness), including crampons and ice axe. Add €200 to €500 for a day with a guide or a 2-day course.
At what age can I start mountaineering? From the age of 12-14, with appropriate guiding (youth clubs, discovery courses). For independent mountaineering, most federations recommend that you have a solid technical grounding, whatever your age.
What is the difference between mountaineering and hiking in the high mountains? Hiking is on marked trails, without ropes or crampons. Mountaineering involves progressing on snow, ice or rock, using technical equipment (crampons, ice axe, rope, harness) and managing the risks involved in exposed terrain.
How long does it take to become an independent mountaineer? With guided training + 4 to 6 outings on easy terrain, a serious beginner can be autonomous on F (Easy) level routes in one season. Autonomy on more challenging terrain (AD, D) generally requires 2 to 3 seasons of regular practice.
How can Wildhartt help you start mountaineering as a beginner?
Yes, Wildhartt offers beginner mountaineering courses in small groups, guided by certified guides. You set off with no previous experience: the guides teach you knots, how to use crampons, rope management and how to read the terrain. Expeditions like theGrand Paradis ascent are designed for motivated beginners who want to enjoy their first real high-mountain adventure, safely and with fun.
Sources: UIAASafety Standards - IFMGA - Mountain Guides - EAWS - Avalanche Risk Scale

Find your next adventure
Browse curated expeditions matching the categories of this article and start planning your next trip.
Find your dream adventure
You might also like these adventures …
Hand-picked to echo the spirit of this article.


More to discover
Keep exploring with these pages and stories picked for you.

4 easy summits for beginner mountaineers
4 easy summits for beginners - Mountaineering courses with DiscoveRent in Maurienne all levels in small groups

A brief guide to mountaineering
Dreaming of taking up mountaineering? Why not start with a mountaineering course to learn the basic techniques.

Top 5 Best Mountaineering Courses to Start Your Alpine Journey
Discover the 5 best mountaineering courses for beginners: accessible formats, advice on progress and easy summits to aim for after your introduction.

mountaineering course: start your adventure in complete safety
Find out how to start mountaineering and choose the ideal mountaineering course. Advice, equipment and training to make your first summits a success.

Beginner's mountaineering: The essentials
Getting started in mountaineering sounds exciting, but it's essential to prepare properly to ensure a safe and enjoyable experience.

Top 5 must-do mountaineering courses: from Mont Viso to Chamonix with Wildhartt
Discover the best destinations for a mountaineering course: Mount Viso in Italy, Chamonix in winter, or the natural beauty of the Ecrins.